Model 1
2025
Solid
The Solid® Model 1 combines the ease and practicality of a moped with the light-weight convenience of an e-bike. This case study delves into the design and development journey that brought this innovative vehicle to life. Working with a small team of electrical and mechanical engineers, I was in charge of all things industrial design, graphic design, and branding.
Our bold hypothesis:
E-bikes are better without pedals
Ok, maybe not all e-bikes. But for everyday use, pedals are often more of a hassle than they’re worth. Benefits of dropping pedals include:
-
We love riding bikes, but sometimes you just want to get where you’re going without the effort. Many e-bikes struggle to climb even moderate hills, meaning it’s on you.
-
Without the need to pedal, more cargo space opens itself up between your knees.
-
Quicker A – B means you’ll ride more and enhance your connection with your environment.
-
No chains, gears, or grease. With almost no moving parts the maintenance is so much lower – like an electric car.
-
Once you have a powerful throttle, you’ll hardly pedal anyways.

Foundation first
Before diving into sketches and prototypes, we needed a clear vision of what this vehicle could be. I dug into the market, defining key features and outlining how people actually want to use their urban vehicles. Bringing the team together around mood boards, competitor research, use cases, and must-have features helped align the team on what to build and where to focus.
Competitive Insights
I sized up the competition to gave us a benchmark for weight, size, and pricing, but since Model 1 was carving out its own category, we had to think beyond direct comparisons. The goal was to create something that felt attainable, approachable, and desirable.
Core Features
Drawing from our previous experience with target demographics at Boosted and Super73, we had a strong sense of the features people love. Merging these insights was an exciting challenge.
We initially prioritized theft protection, but real-world testing and user feedback revealed that riders weren’t willing to pay the premium required to implement it.
Design Language
I conducted an in-depth analysis of the team’s favorite car, bike, and consumer electronics brands to understand what made them so desirable. From this, we identified the key qualities that resonated most with the team and aligned with our vision for the bike. We wanted it to feel like a trusted friend – always ready for a good time and reliable when you need it most.
Sketching, Modeling, Iterating
I began by iterating bold, recognizable silhouettes to establish a memorable first impression. Explorations included things like step-through vs. top tube architecture, front vs. full suspension, and battery placement. The process moved from quick digital sketches to VR modeling and then into refined CAD work as we locked in the details.
Solidworks underlay for seat explorationCAD development for refined renders
prototypes
We built five working prototypes to put our ideas to the test. These helped us fine-tune the vehicle and connect with our most enthusiastic users.
What we learned
Geometry & Ergo
We designed these prototypes with a modular setup—adjusting wheelbase, rider height, foot placement, and steering response on the fly. The result? A ride that felt stable yet nimble, so even inexperienced riders felt confident riding it.
One challenge we uncovered: mounting the battery under the seat negatively affected seat ergonomics, making longer rides uncomfortable. Making a comfortable seat would be critical to the bike’s success.
Power & Performance
To make them fun, responsive, and easy to ride, we put a motor in both the front and rear wheels. This provided incredible power and torque without adding unnecessary complexity. The results were immediately apparent – this thing rips.
We tested these prototypes with bi-directional throttles from the Boosted Rev scooter, which enabled regenerative braking. That braking proved to be something users still crave and remained a high priority for the team.
Cargo & Accessories
I created a modular mounting system inspired by military MOLLE rails, allowing us to customize our riders’ setups based on their needs. This helped us understand what and how they really wanted to carry stuff.
Our riders told us that passenger seating felt compromised. Most of them wanted to be able to take a full-size adult passenger at least occasionally – we needed to make this happen.
Visual Appeal
Due to limitations with locally available bending dies, the final form didn’t have the balance we originally envisioned. Users wanted something that better captured the thrill of riding the bike.
One thing we did get right? It stood out while still feeling friendly and fun. Its ability to turn heads and spark conversation was something we tried to preserve as we explored our design further.
The big question:
What kind of bike did riders actually want?

To find out, we kicked off a design sprint exploring three distinct concepts – each with its own unique personality.

Looptail
Striking yet familiar, this evolution of the original concept better communicates its performance while keeping its classic vibe. Lowering the battery improves seat comfort, lowers the center of gravity, and slims the bike’s visual mass. A beefier rear rack expands cargo capacity and enables passenger seating, making it both practical and iconic.

Hi-Step
Approachable yet rugged, this step-thru design feels instantly familiar to everyday riders while maximizing utility. The open space above the battery unlocks new cargo possibilities, and the oversized rear rack is built for serious hauling. With a subtle nod to retro mopeds like the Honda Trail, it balances simplicity with all-terrain versatility.

Pit Vert
Sporty and aggressive, this concept’s near-vertical seat tube and sloped top tube create a poised, primed-to-strike stance that emphasizes performance. A removable rear rack offers flexible utility, making it feel like a high-powered sports car with unexpected cargo capacity.
Developed with Jukka Rautiainen
User Feedback
By evaluating all three concepts side by side, we gathered direct feedback on what truly matters to our riders. Most conversations revolved around how much cargo capacity they really needed and what style of bike resonated with their personal image. These conversations guided our decisions, ensuring that the final design wasn’t just something we thought was great—but something real users actually wanted.
The answer
The Hi-Step’s approachable and rugged design delivers utility, manufacturability, and everyday ease. With a familiar step-thru silhouette, extra cargo capacity, and a hint of retro DNA, it feels simultaneously practical and adventurous.
The Model 1 is a bold yet familiar step toward the future. Its bike-like form feels instantly inviting, encouraging riders to explore their world in a whole new way.
Logo design by Levi Price
Develoment
Take a look behind the scenes to see how we continued our development for production.
Frame
With a tight rear triangle and a high chainstay, the frame is built for go-anywhere capability – a nod to the classics. It’s oversized, hydroformed downtube acts as a strong backbone, both visually and structurally. Internal routing and bolt-on CMF contrast points keep the silhouette clean and streamlined while chunky tube profiles and exposed fasteners help the bike feel… solid. Large cutouts facilitate motor controller integration and easy wire harness routing.

Frame post heat treating. Steel fixtures hold critical dimensions in place during the process. Notice the large frame openings and the motor cable routing in the right chainstay.

1/4 scale print to better evaluate proportions and fit

Clear frame print to evaluate cable routing and as a fit check for all major components.

We initially planned on putting both motor controllers in the rear of the seat tube, but assembly proved difficult, so one controller was moved to the downtube instead.
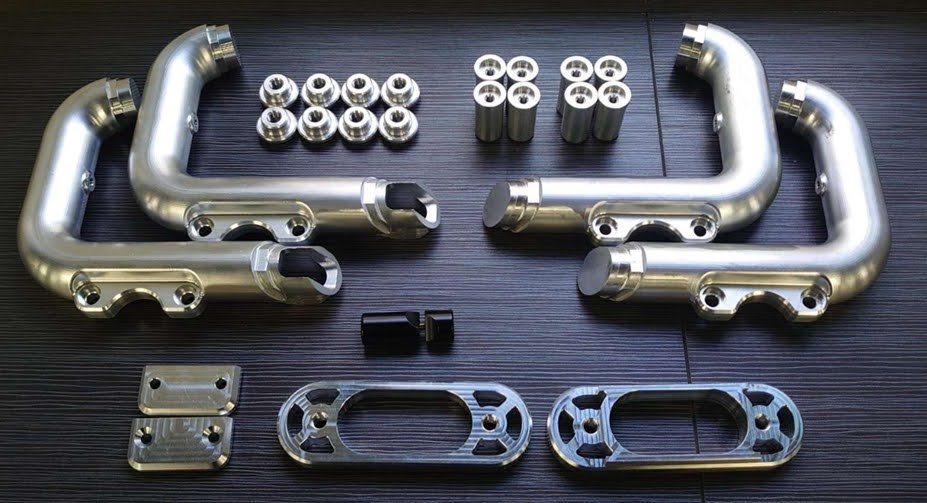
Machined parts for prototype frames. As production parts, the rear dropouts would be forged, the peg mount extruded, and the small parts turned or forged depending on quantities.

Main frame tube is extruded, hydroformed, and laser cut. Tooling was made for this part since there's no other way to prototype it.

Peg Mount interface with frame before welding.
Racks
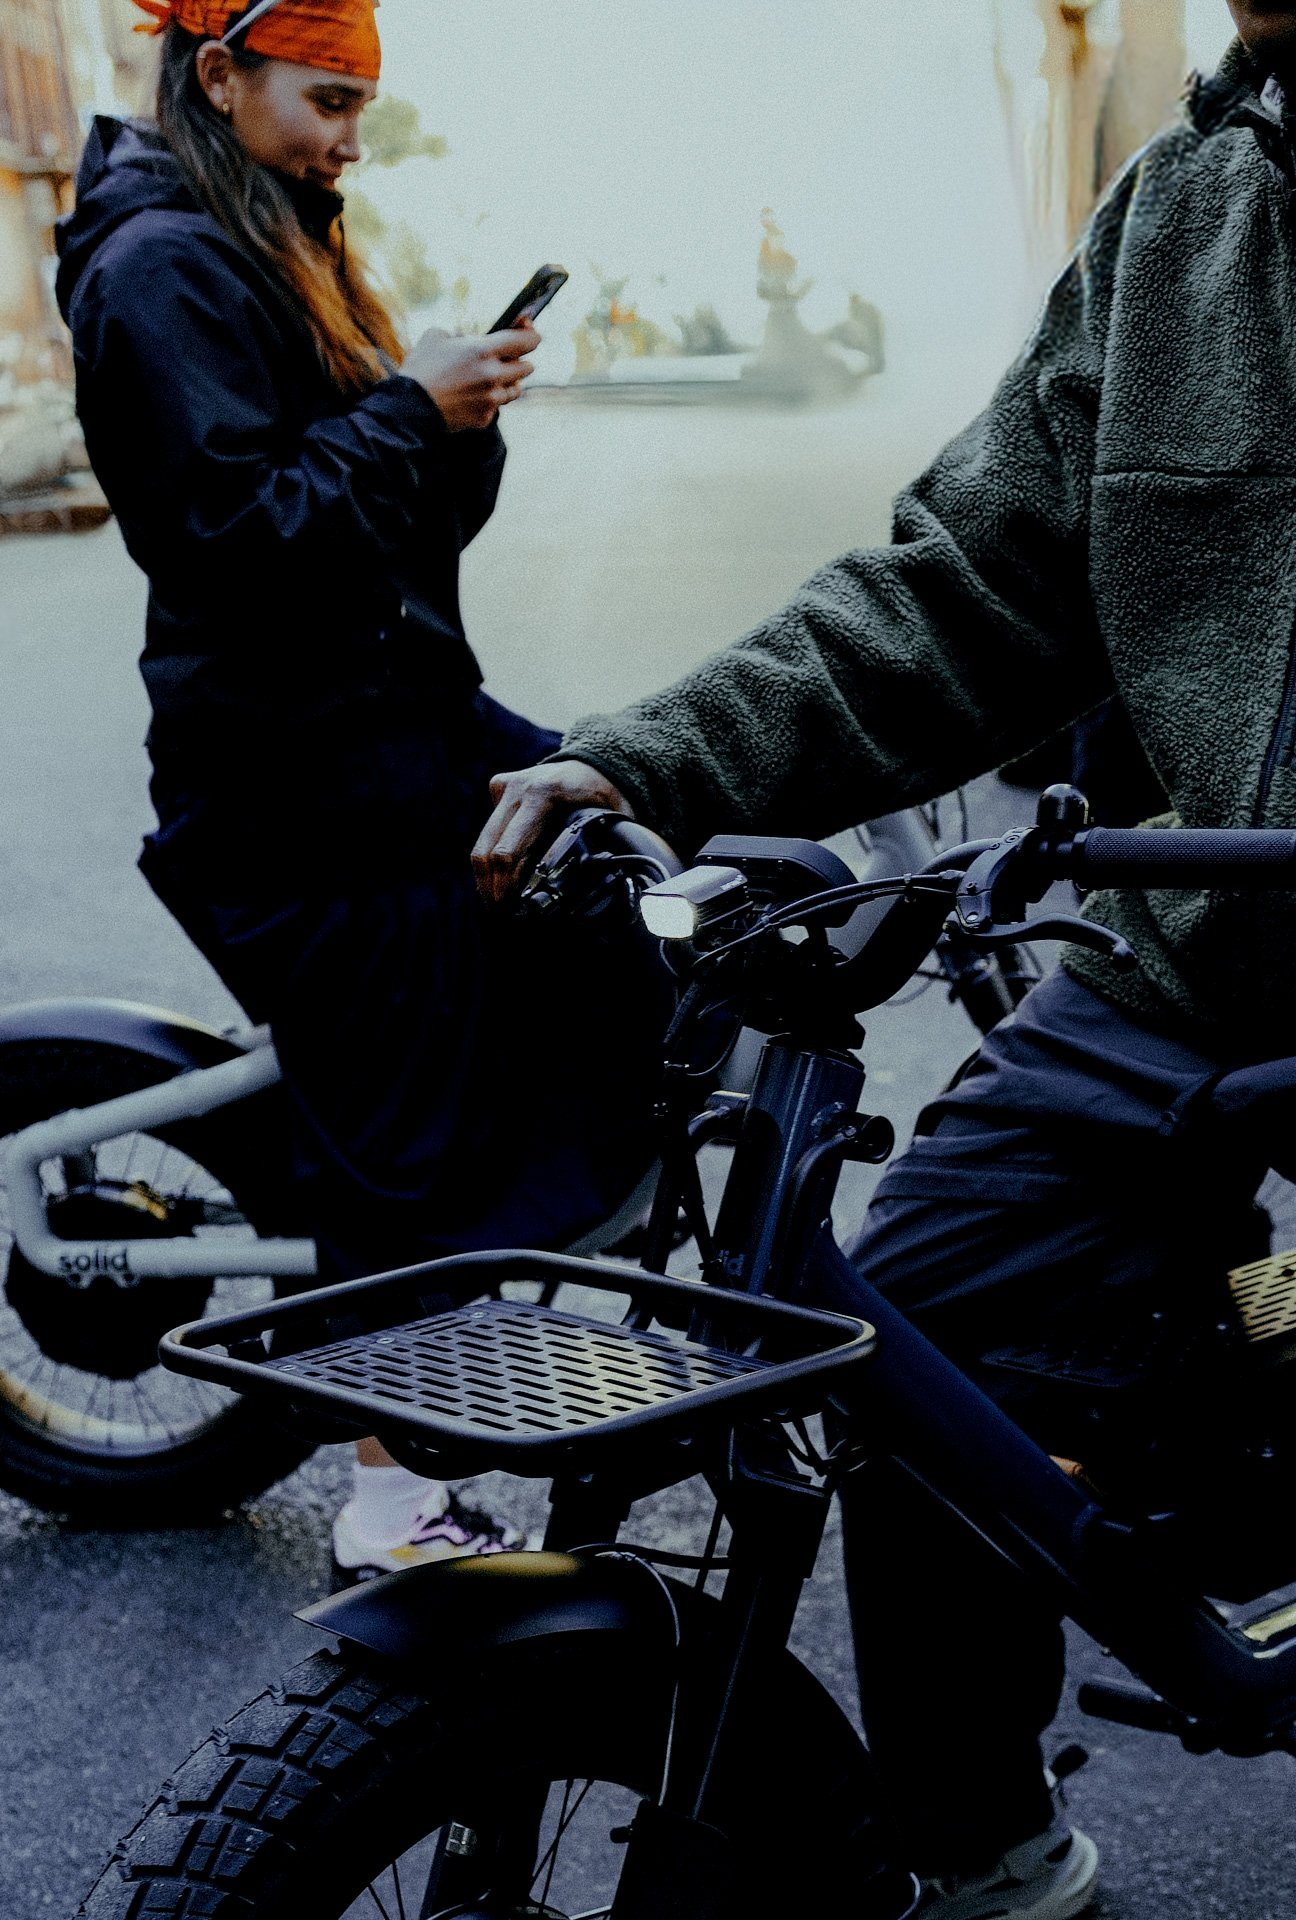
We maximized utility by creating extra storage locations and integrating a modular mounting architecture throughout.
Rear Rack
The workhorse – built to carry heavy loads up to 150kg, it features pannier rails, a thick aluminum mounting plate, and our molle attachment system, so you can hook, strap, or bolt gear with ease. M6 screws fit perfectly into the slots for more secure setups.
Center Rack
Surprisingly useful. Perfect for precious cargo like a larger child, takeout, or anything you want to keep close. Since there are no pedals, you can use your knees to help stabilize items.
Front Rack
Designed to accommodate oversized loads like a pizza box while keeping a raised perimeter to secure smaller items. You can bungee almost anything to it.

Cerrying takeout between my legs

Testing the width limits of the center rack

Testing extra-large items on the rear rack

Larger kids fit great on the center rack with just a pad

Lock storage. Voile straps work perfectly

Front rack in action

Prototype center rack concept
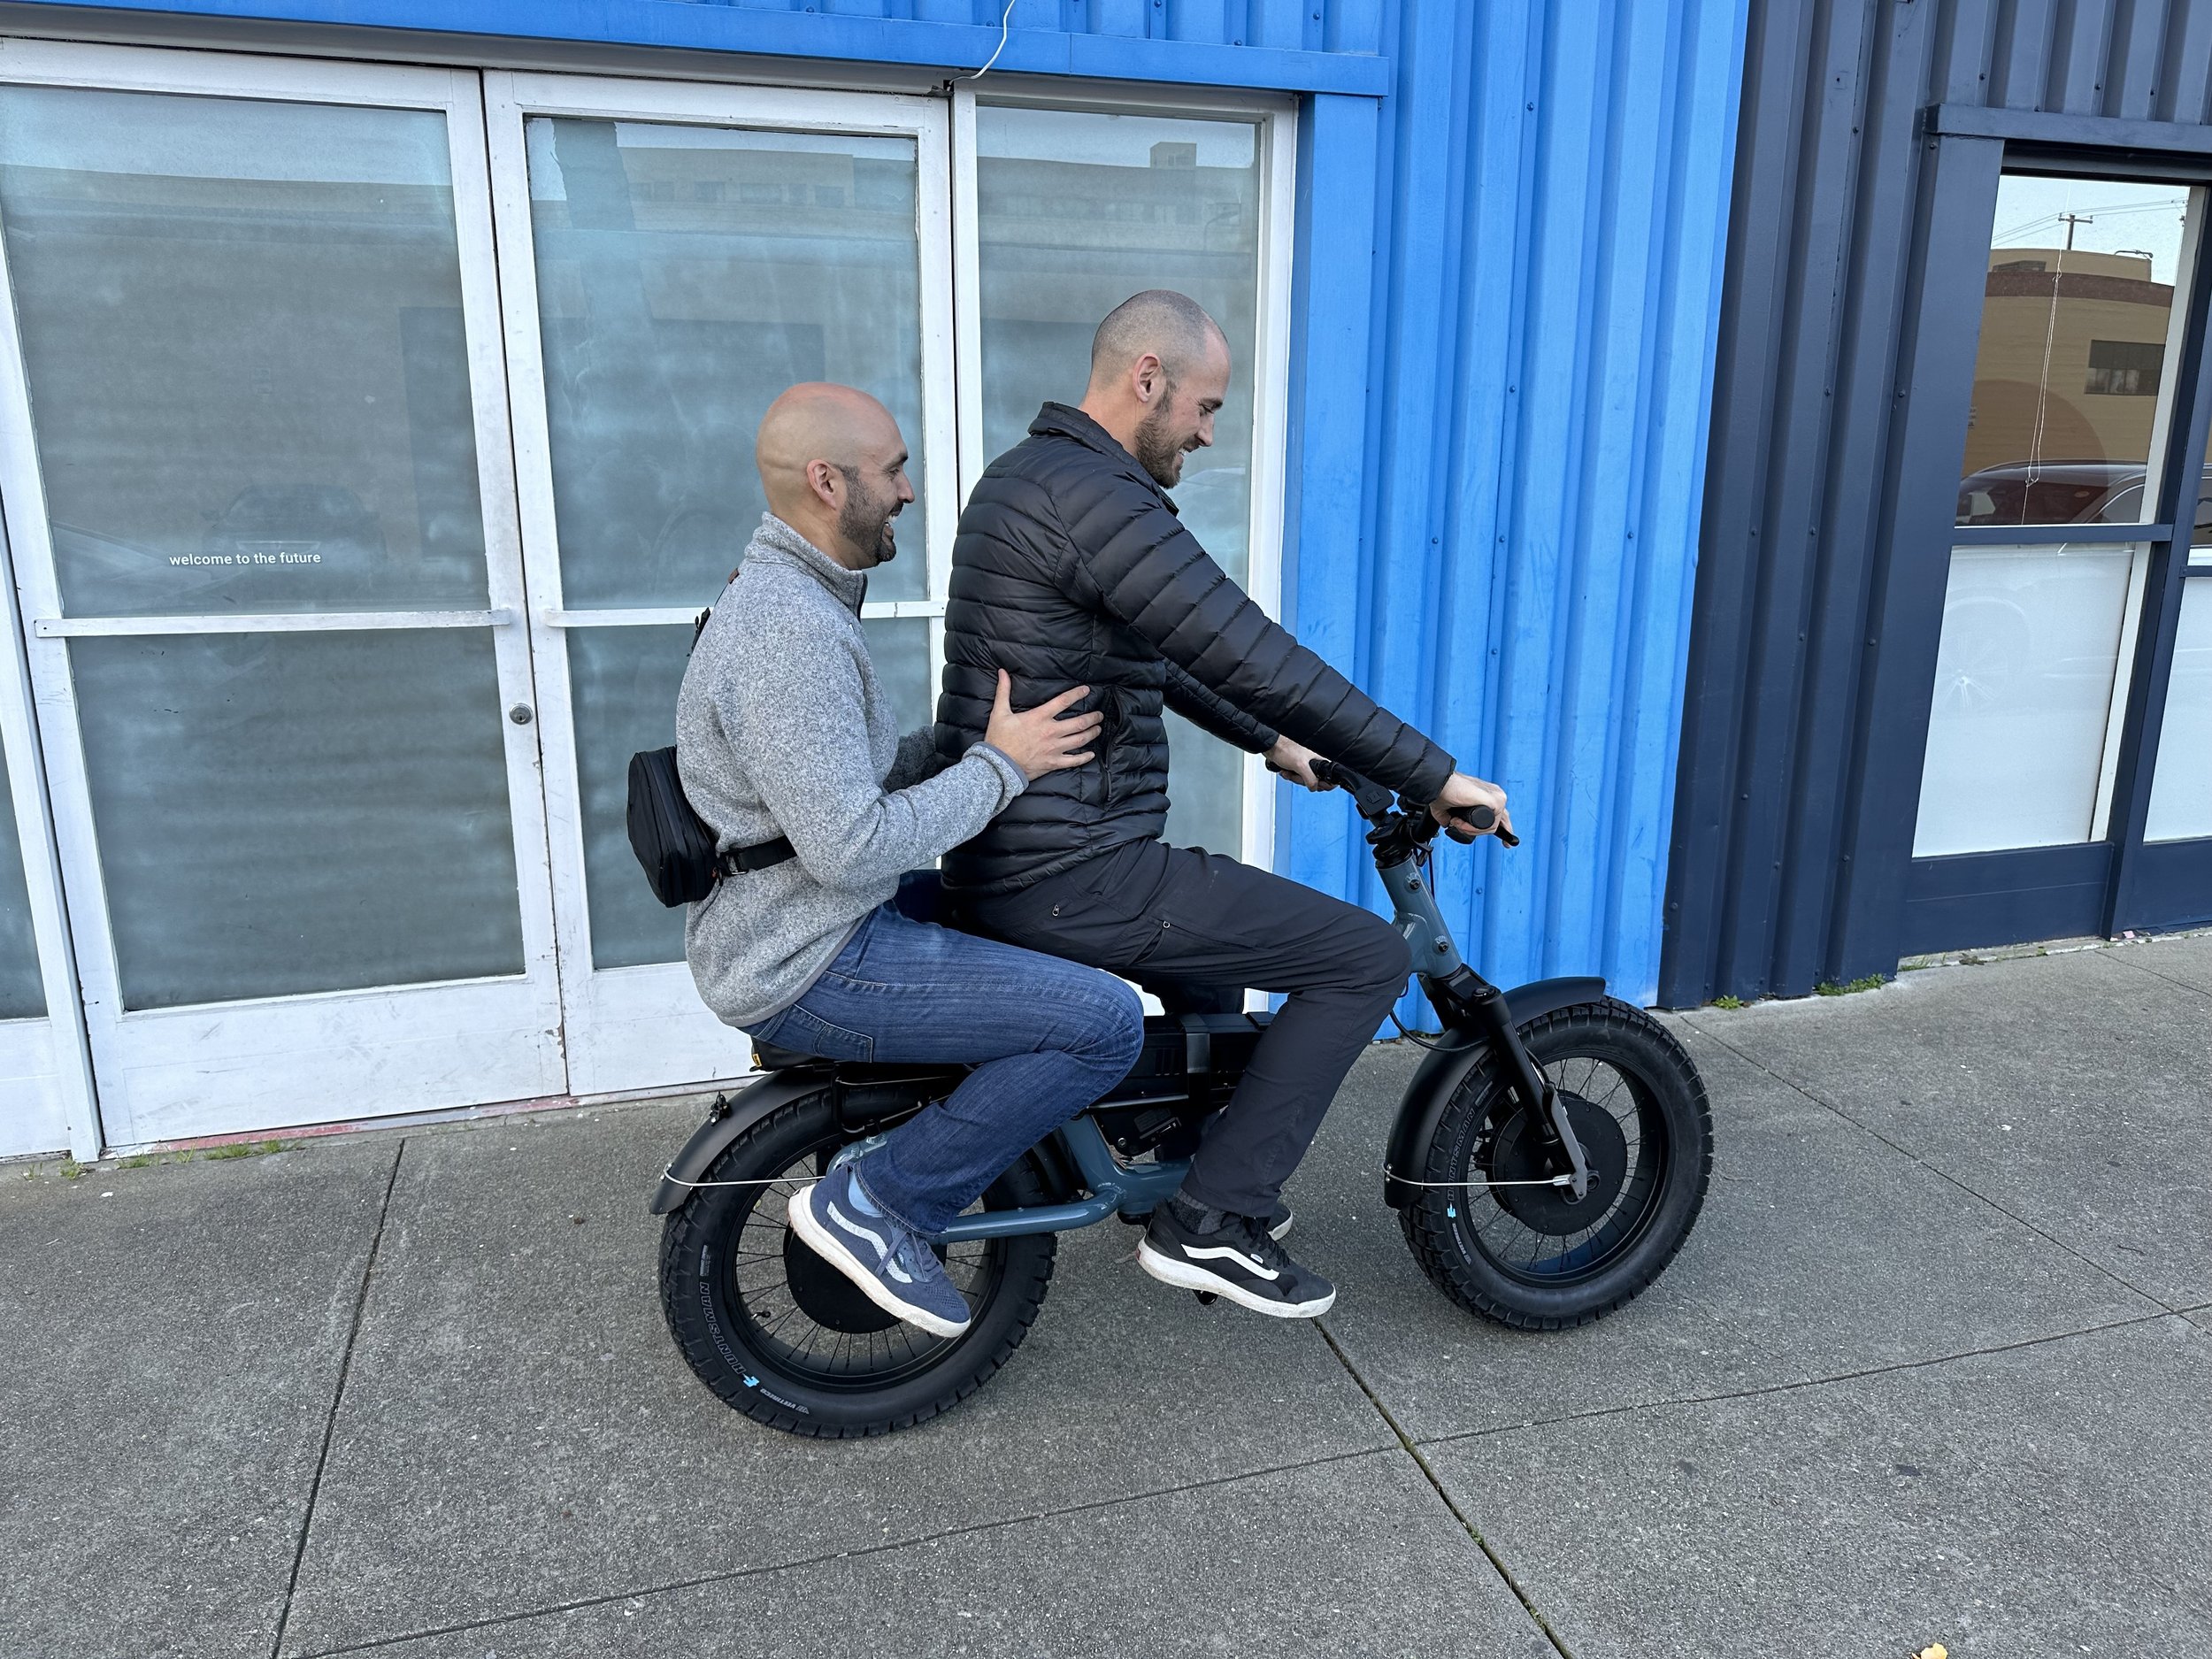
First test with full size passenger
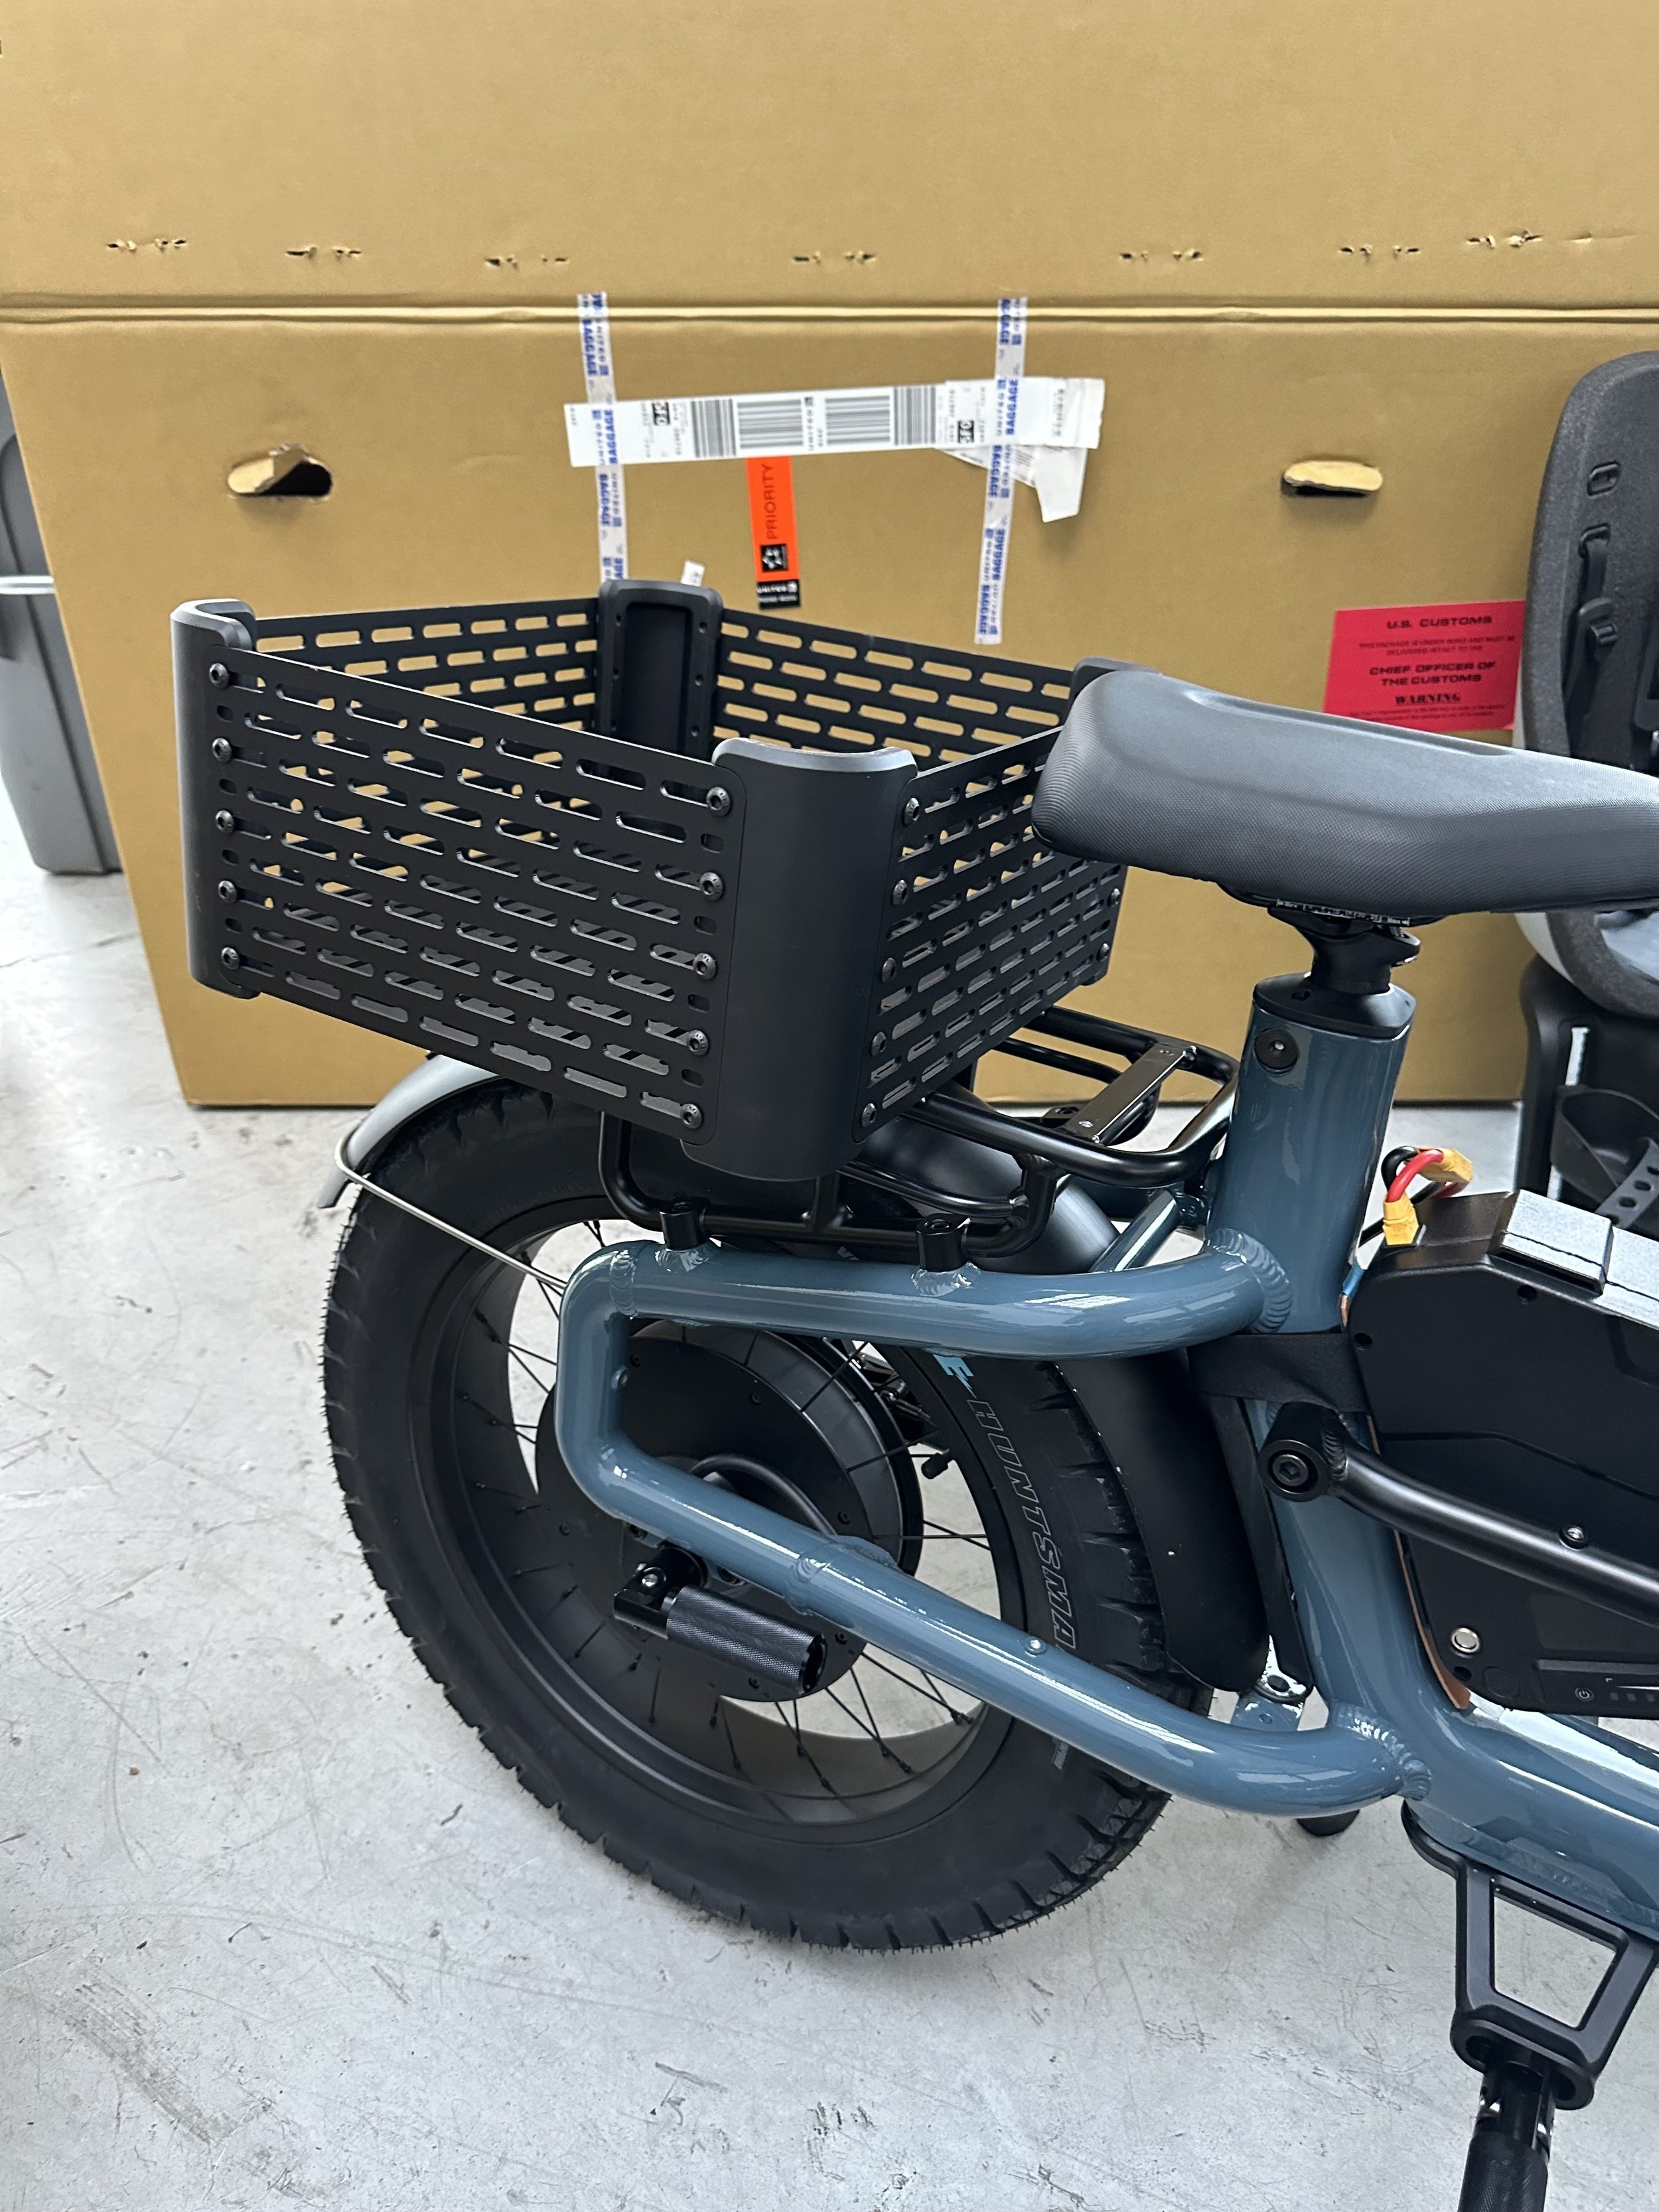
Custom aluminum milk crates with our molle pattern throughout

Using one bike to film the other in NYC

Battery
The battery pack nests into the frame, secured by two structural brackets. After exploring multiple housing architectures and cell configurations, we landed on a 3-part clamshell design with the BMS and charge port mounted along the top of the cells for easy access. The high-power discharge port is located below the battery where it’s secure and protected. Balancing high-quality surfaces with molding constraints was a key focus of the final design.

Early concept for cell blocking and charge discharge port location

Secondary concept for discharge port location

Concept illustration for extruded profile with molded sides

Surface exploration for drafted 2-part clamshell design

Exploration for 3-part plastic construction

Exploration for 3-part construction with extruded aluminum center profile

Final cell & BMS configuration
Pegs
Designed for both rider and passenger comfort, the same folding pegs can mount to the front peg hanger or the rear dropouts for passenger use. They feature an anti-rotation connection for easy and safe mounting. The peg hanger mounts securely to the bike frame and allows fore-aft fine tuning of the rider peg position.

Form and surfacing exploration

M10 Bolt detail for mounting to peg with a single tool

Peg prototype from Taiwanese vendor showing oblong mating feature
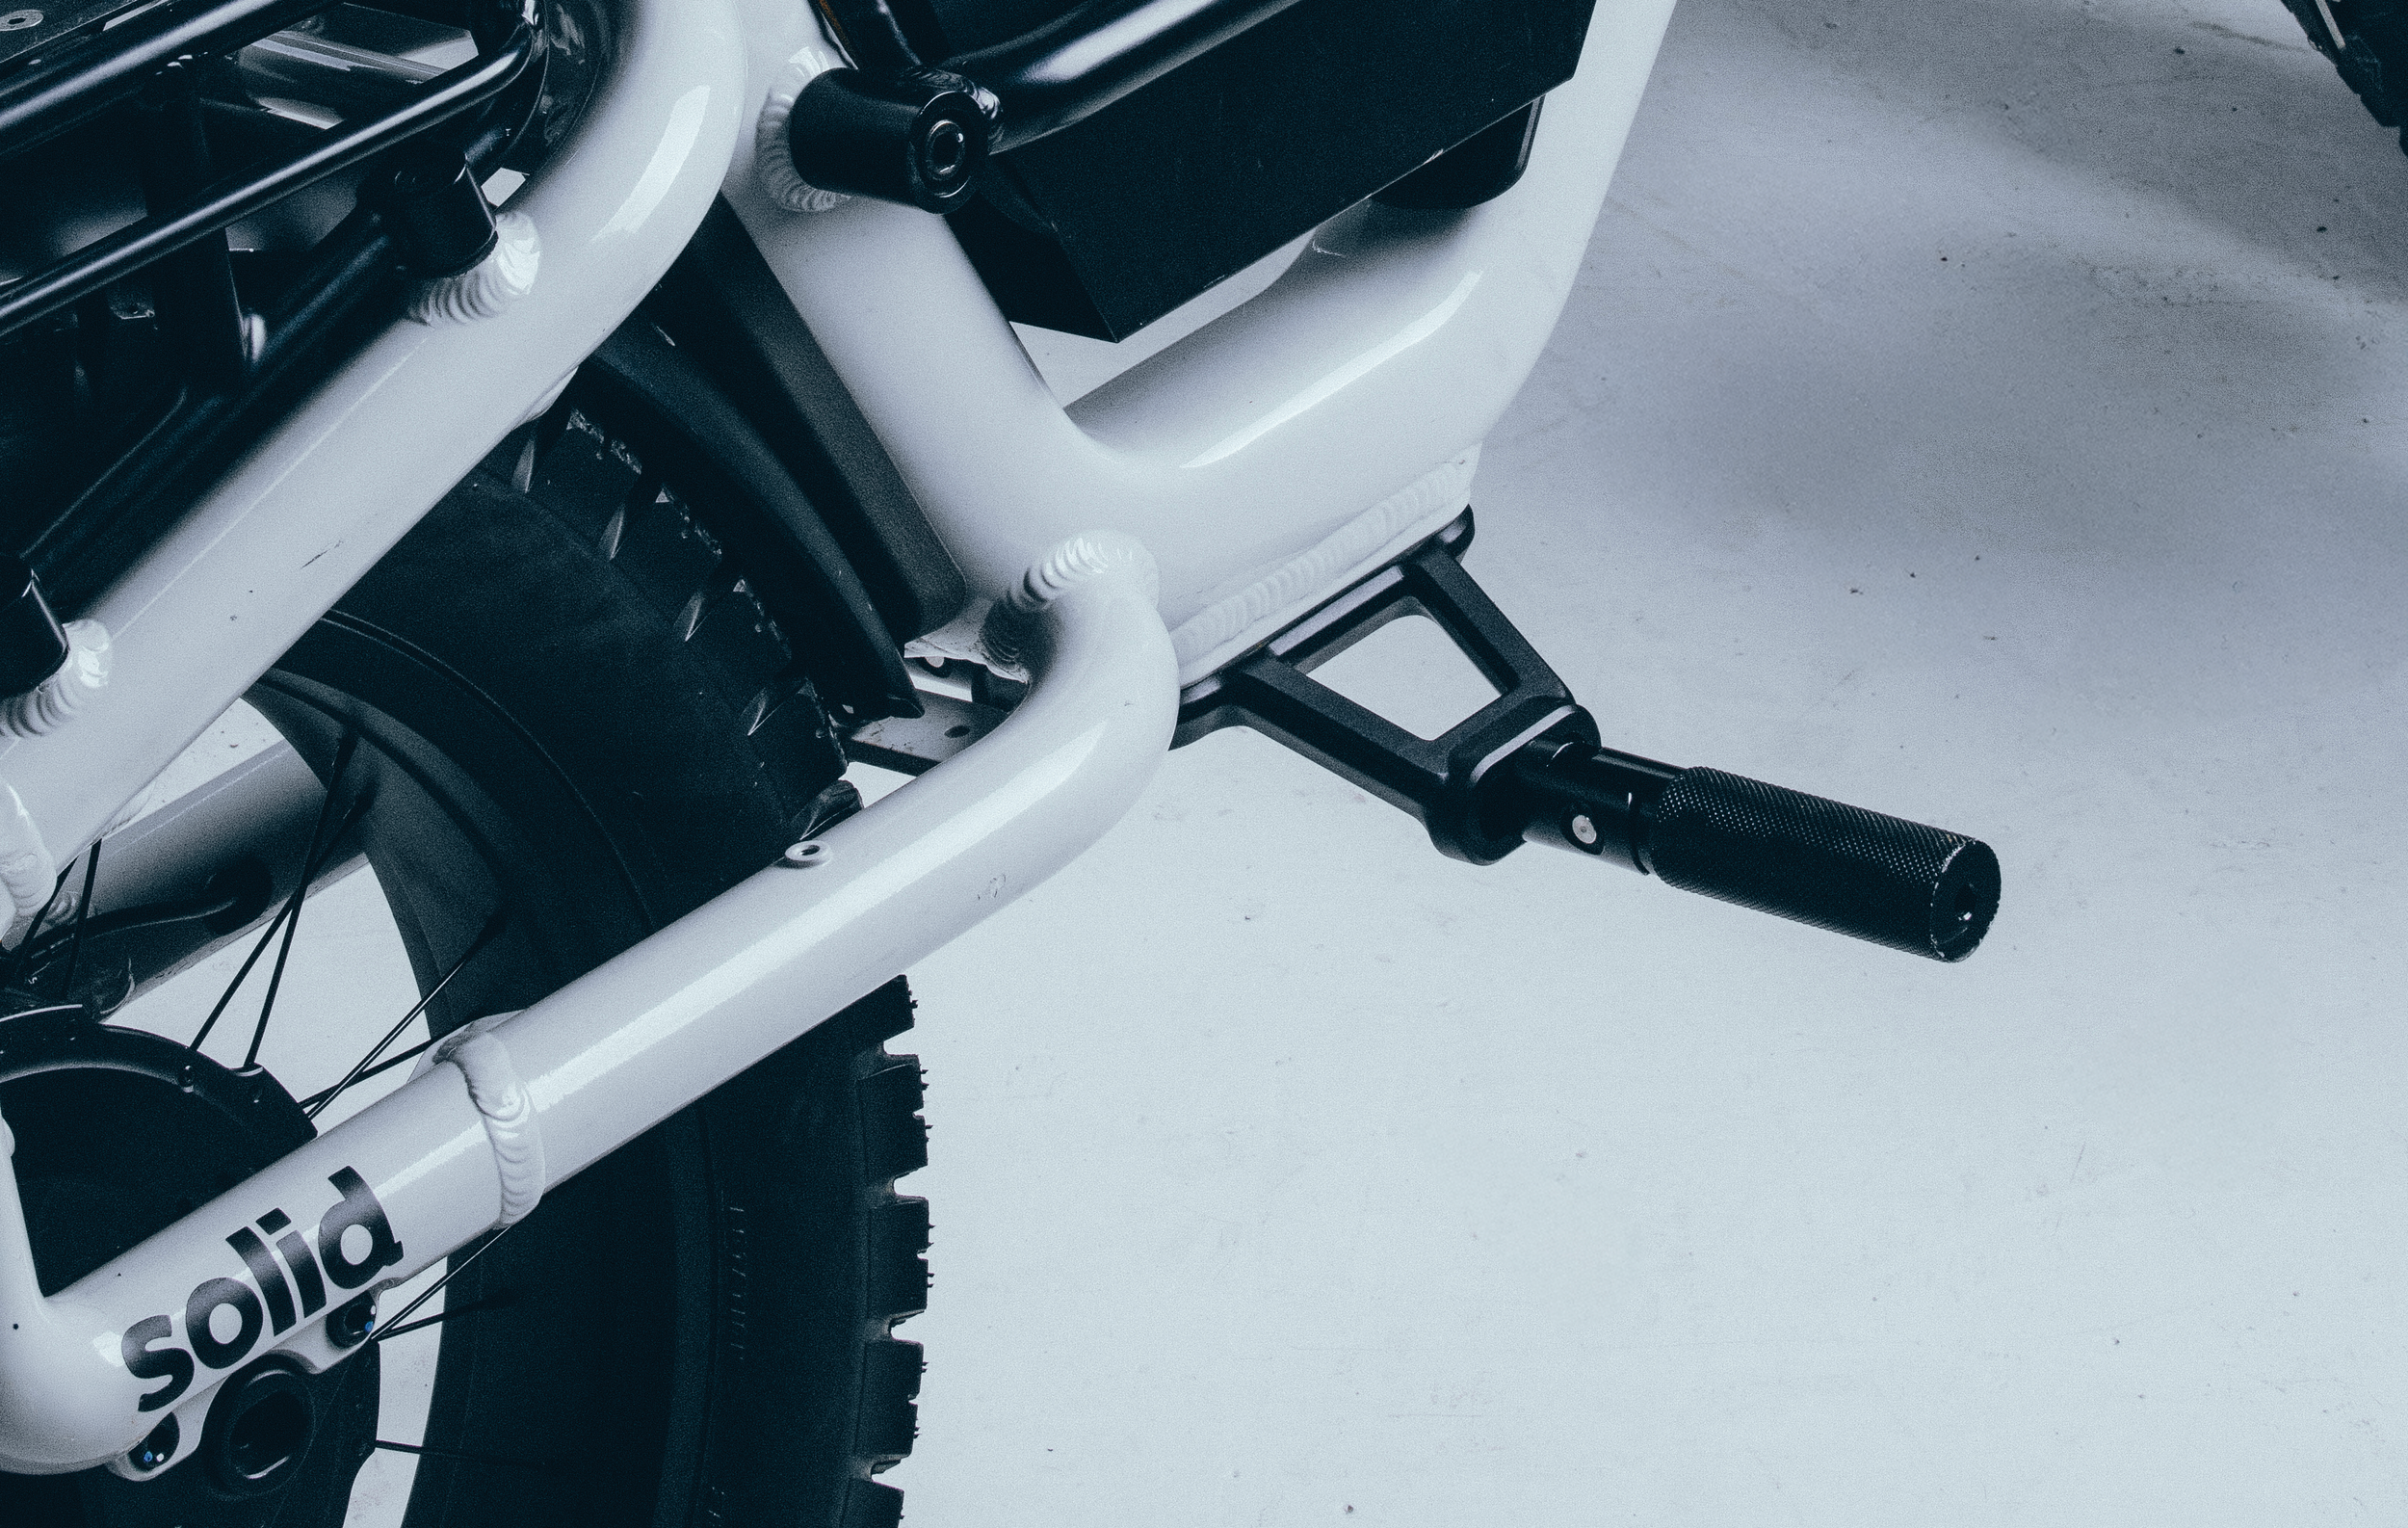
Machined prototype mounted to frame

Motor
We developed our own motor to ensure the powertrain can perform. Working with our manufacturing partner in Taiwan, A we integrated the torque arm directly into the axle. This enabled us to use a suspended front fork while making wheel removal much easier compared to bolt-on torque arms. The housing’s simple form communicates power and durability in a refined package.
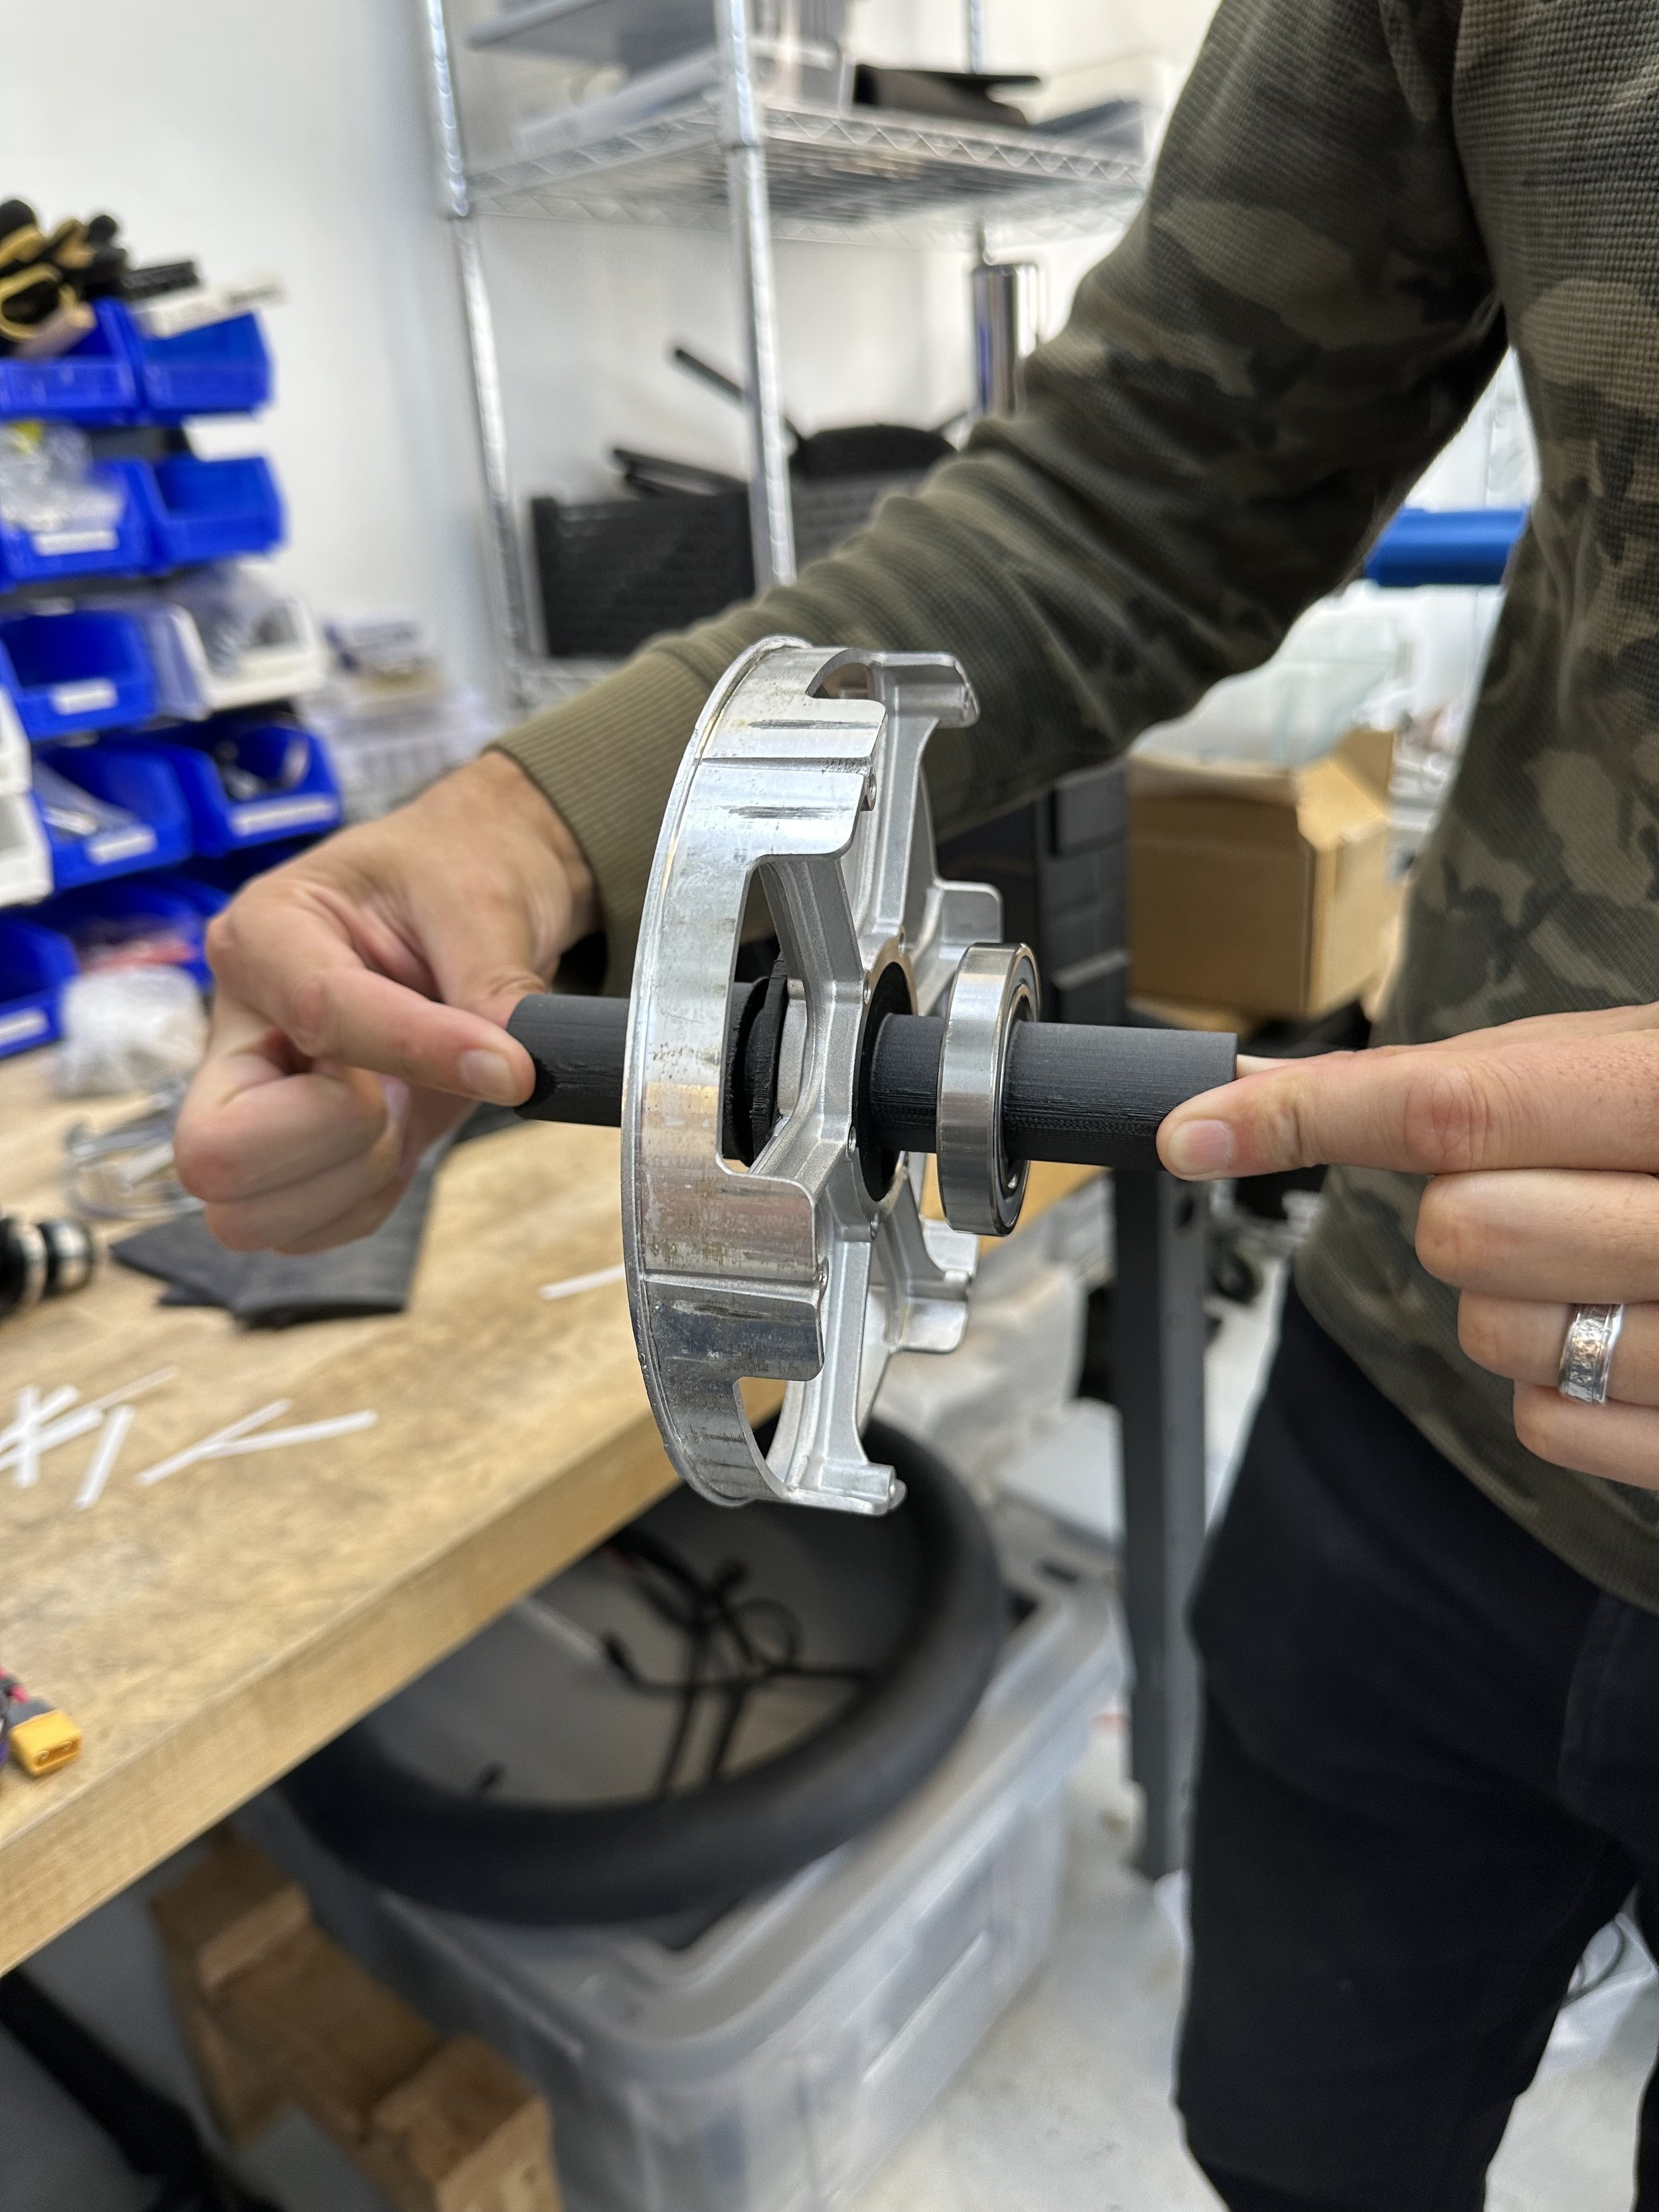
3D print of our custom axle to check fit with stator

Machined axle prototype with integrated torque arm interface

First article from our Taiwanese vendor showing ID surfaces, CMF, and full integration
Fork
Mounting a front motor on a suspension fork isn’t easy, but this challenge led us to develop an inverted moto-style fork. This minimized tooling costs while allowing us to smoothly integrate our torque-arm axle for a clean and functional solution. The stanchion covers also serve as stiffeners for the front fender and a mounting point for the motor connector. The crown complements the motor’s rugged forms while remaining stiff and strong.

First printed prototype for fit check

Designing the fender mounting strategy and integration with mud guards

Initial exploration of cable routing for the large front motor cable

3D printed prototype with zip-tied Higo motor connector

Curvature-continuous crown design
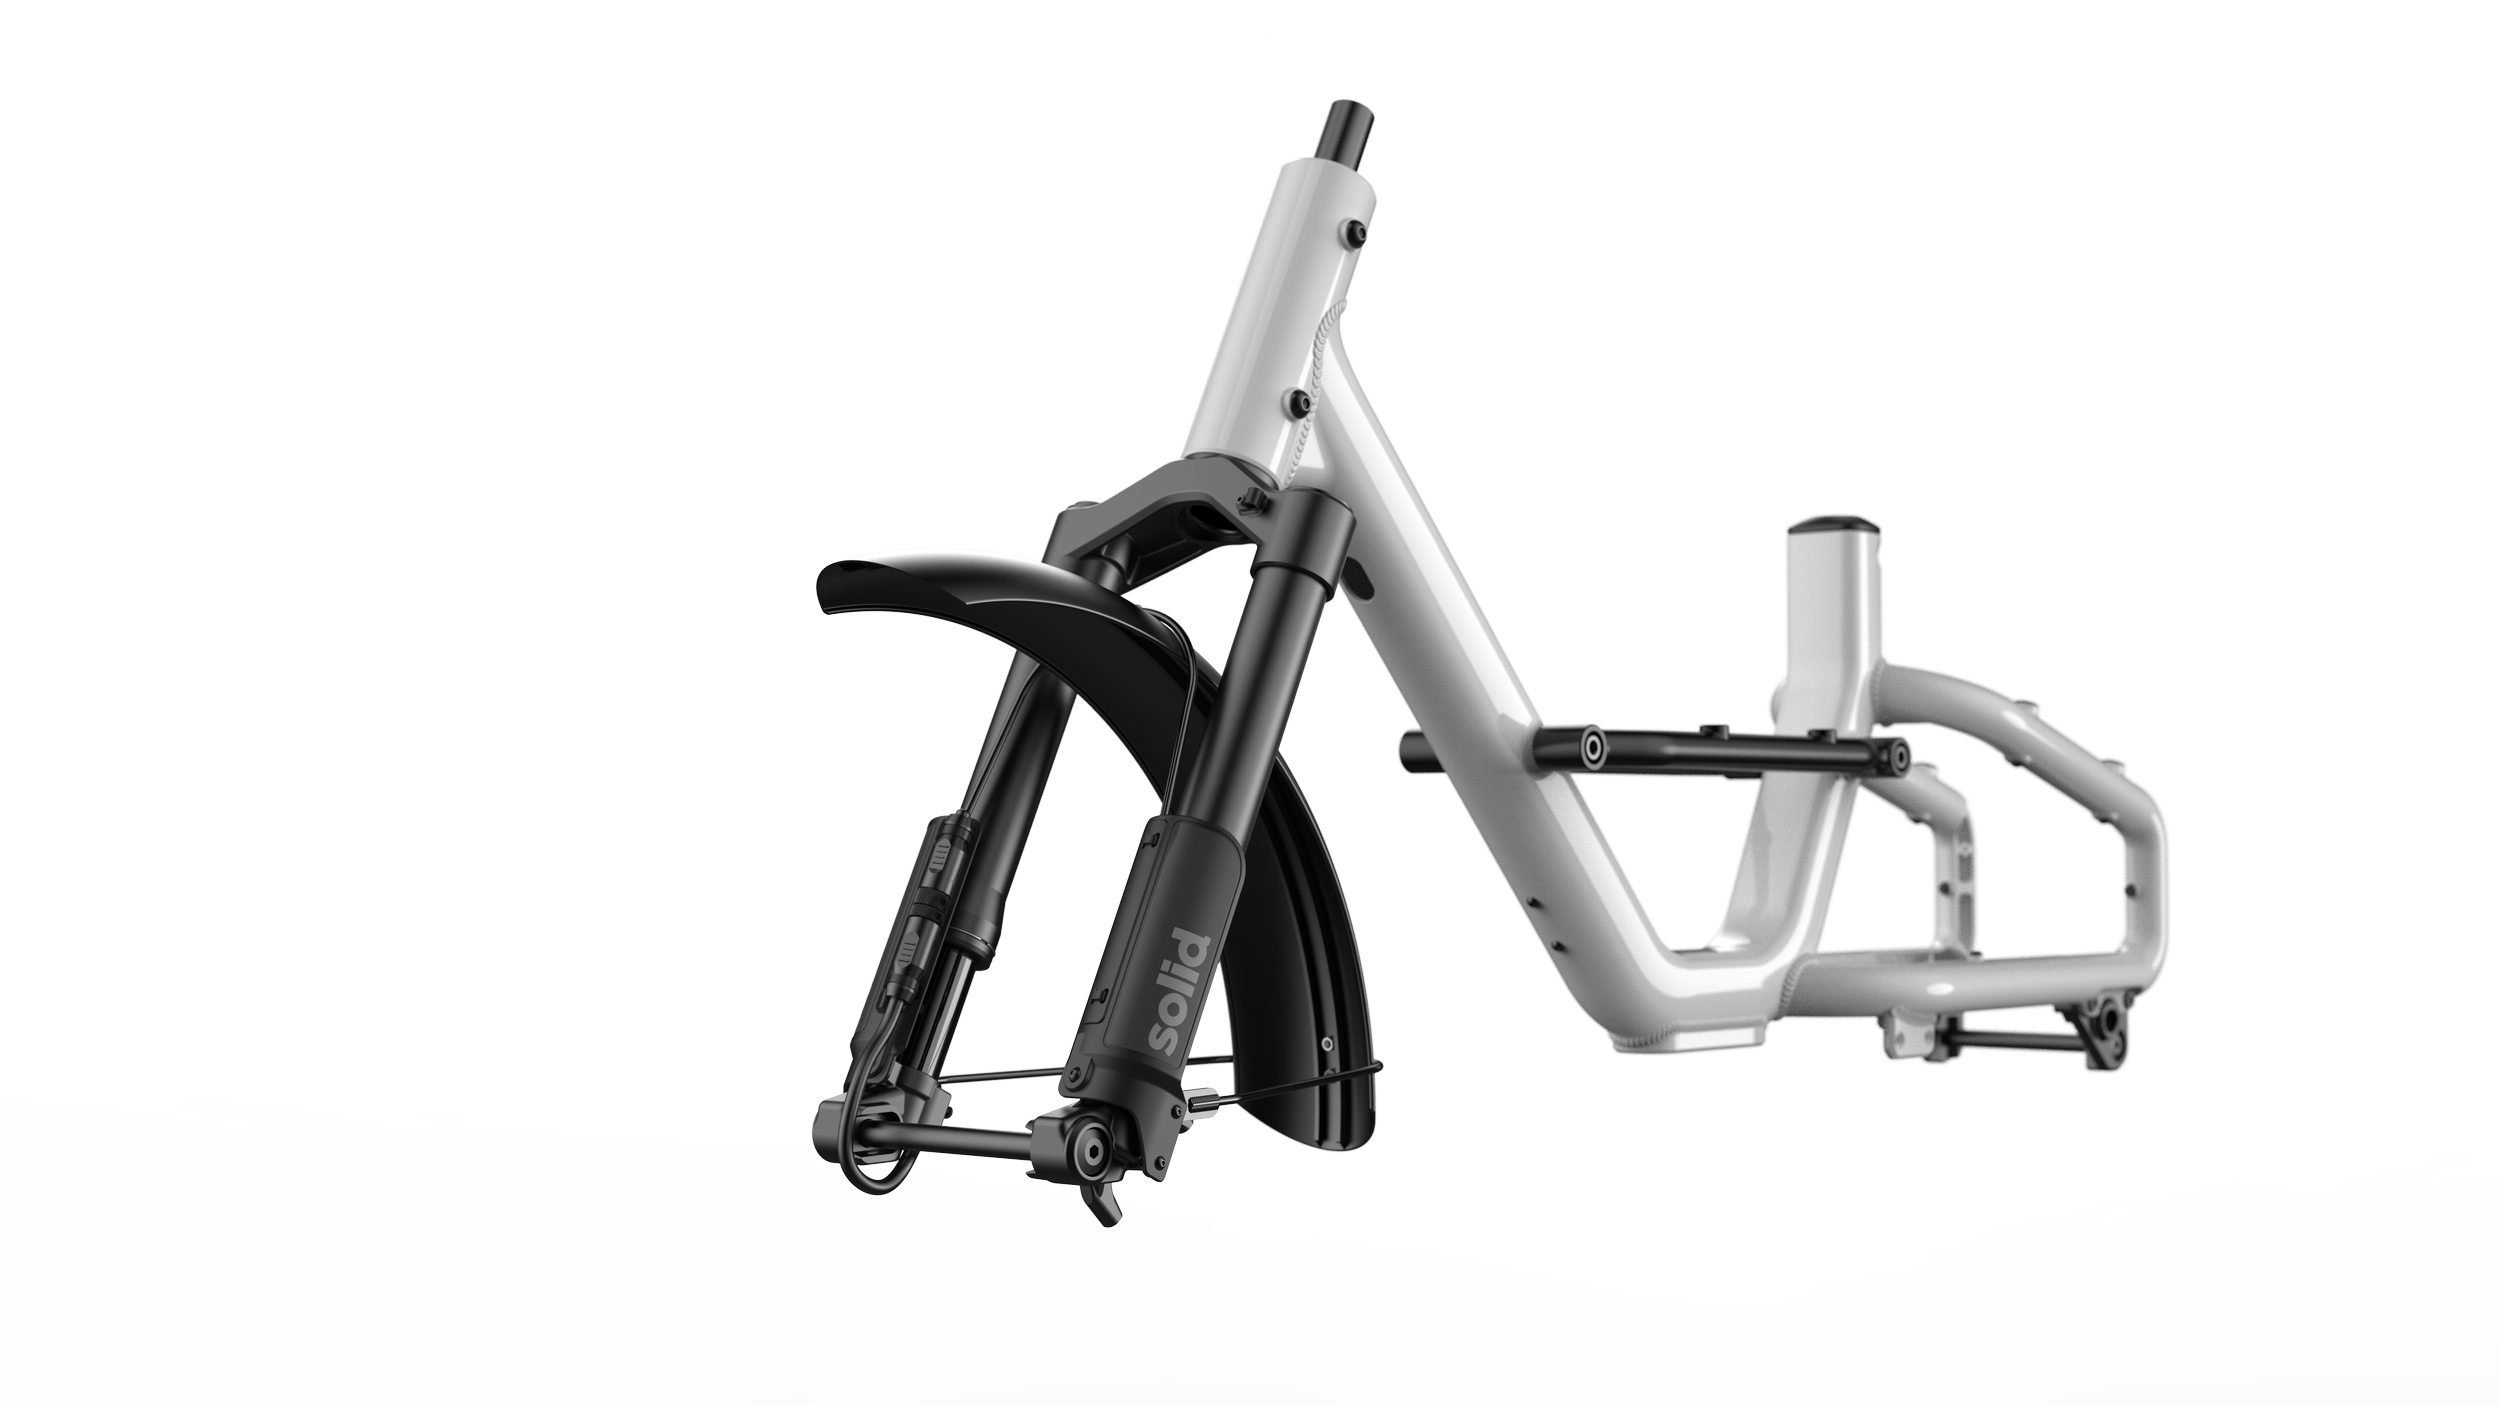
Integration with frame

Throttle
We knew from our previous work at Boosted that the throttle control could make or break the rider experience – especially with regenerative braking being so important to them. Our new design provides that high-fidelity control, ensuring smooth acceleration and braking at the push and pull of a thumb. I added a dished surface around the wheel so your thumb feels locked-in, preventing jerky movements when riding over rough terrain. To get the ergonomics just right we experimented with dozens of physical prototypes. Everybody’s hands and how they use them are surprisingly diverse, so the final design has adjustability built in, enabling riders to fine tune it how they like.

Dished profile tested to fit thumbs both big and small

Exploring different throws and knurling patterns. Something like this take a lot of prototyping and A:B testing

Near-final texture. The large slots provide a macro grip, while the fine knurl sticks to your skin.

Early concept for a user interface with turn signals and horn.
Display
We kept the UI simple and intuitive, so riders can focus on the road. But beneath the clean interface, it packs GPS, cellular, and BTLE connection for OTA updates and tracking precision to the nearest meter. The single button enables quick ride mode toggling, letting users adjust speed and acceleration settings on the fly. This is especially useful for timid or first time riders and makes it so even your grandma can ride with confidence.

Display board with GPS, LTE, & Bluetooth

Working interface in action

Early exploration of a turn signal interface

Saddle
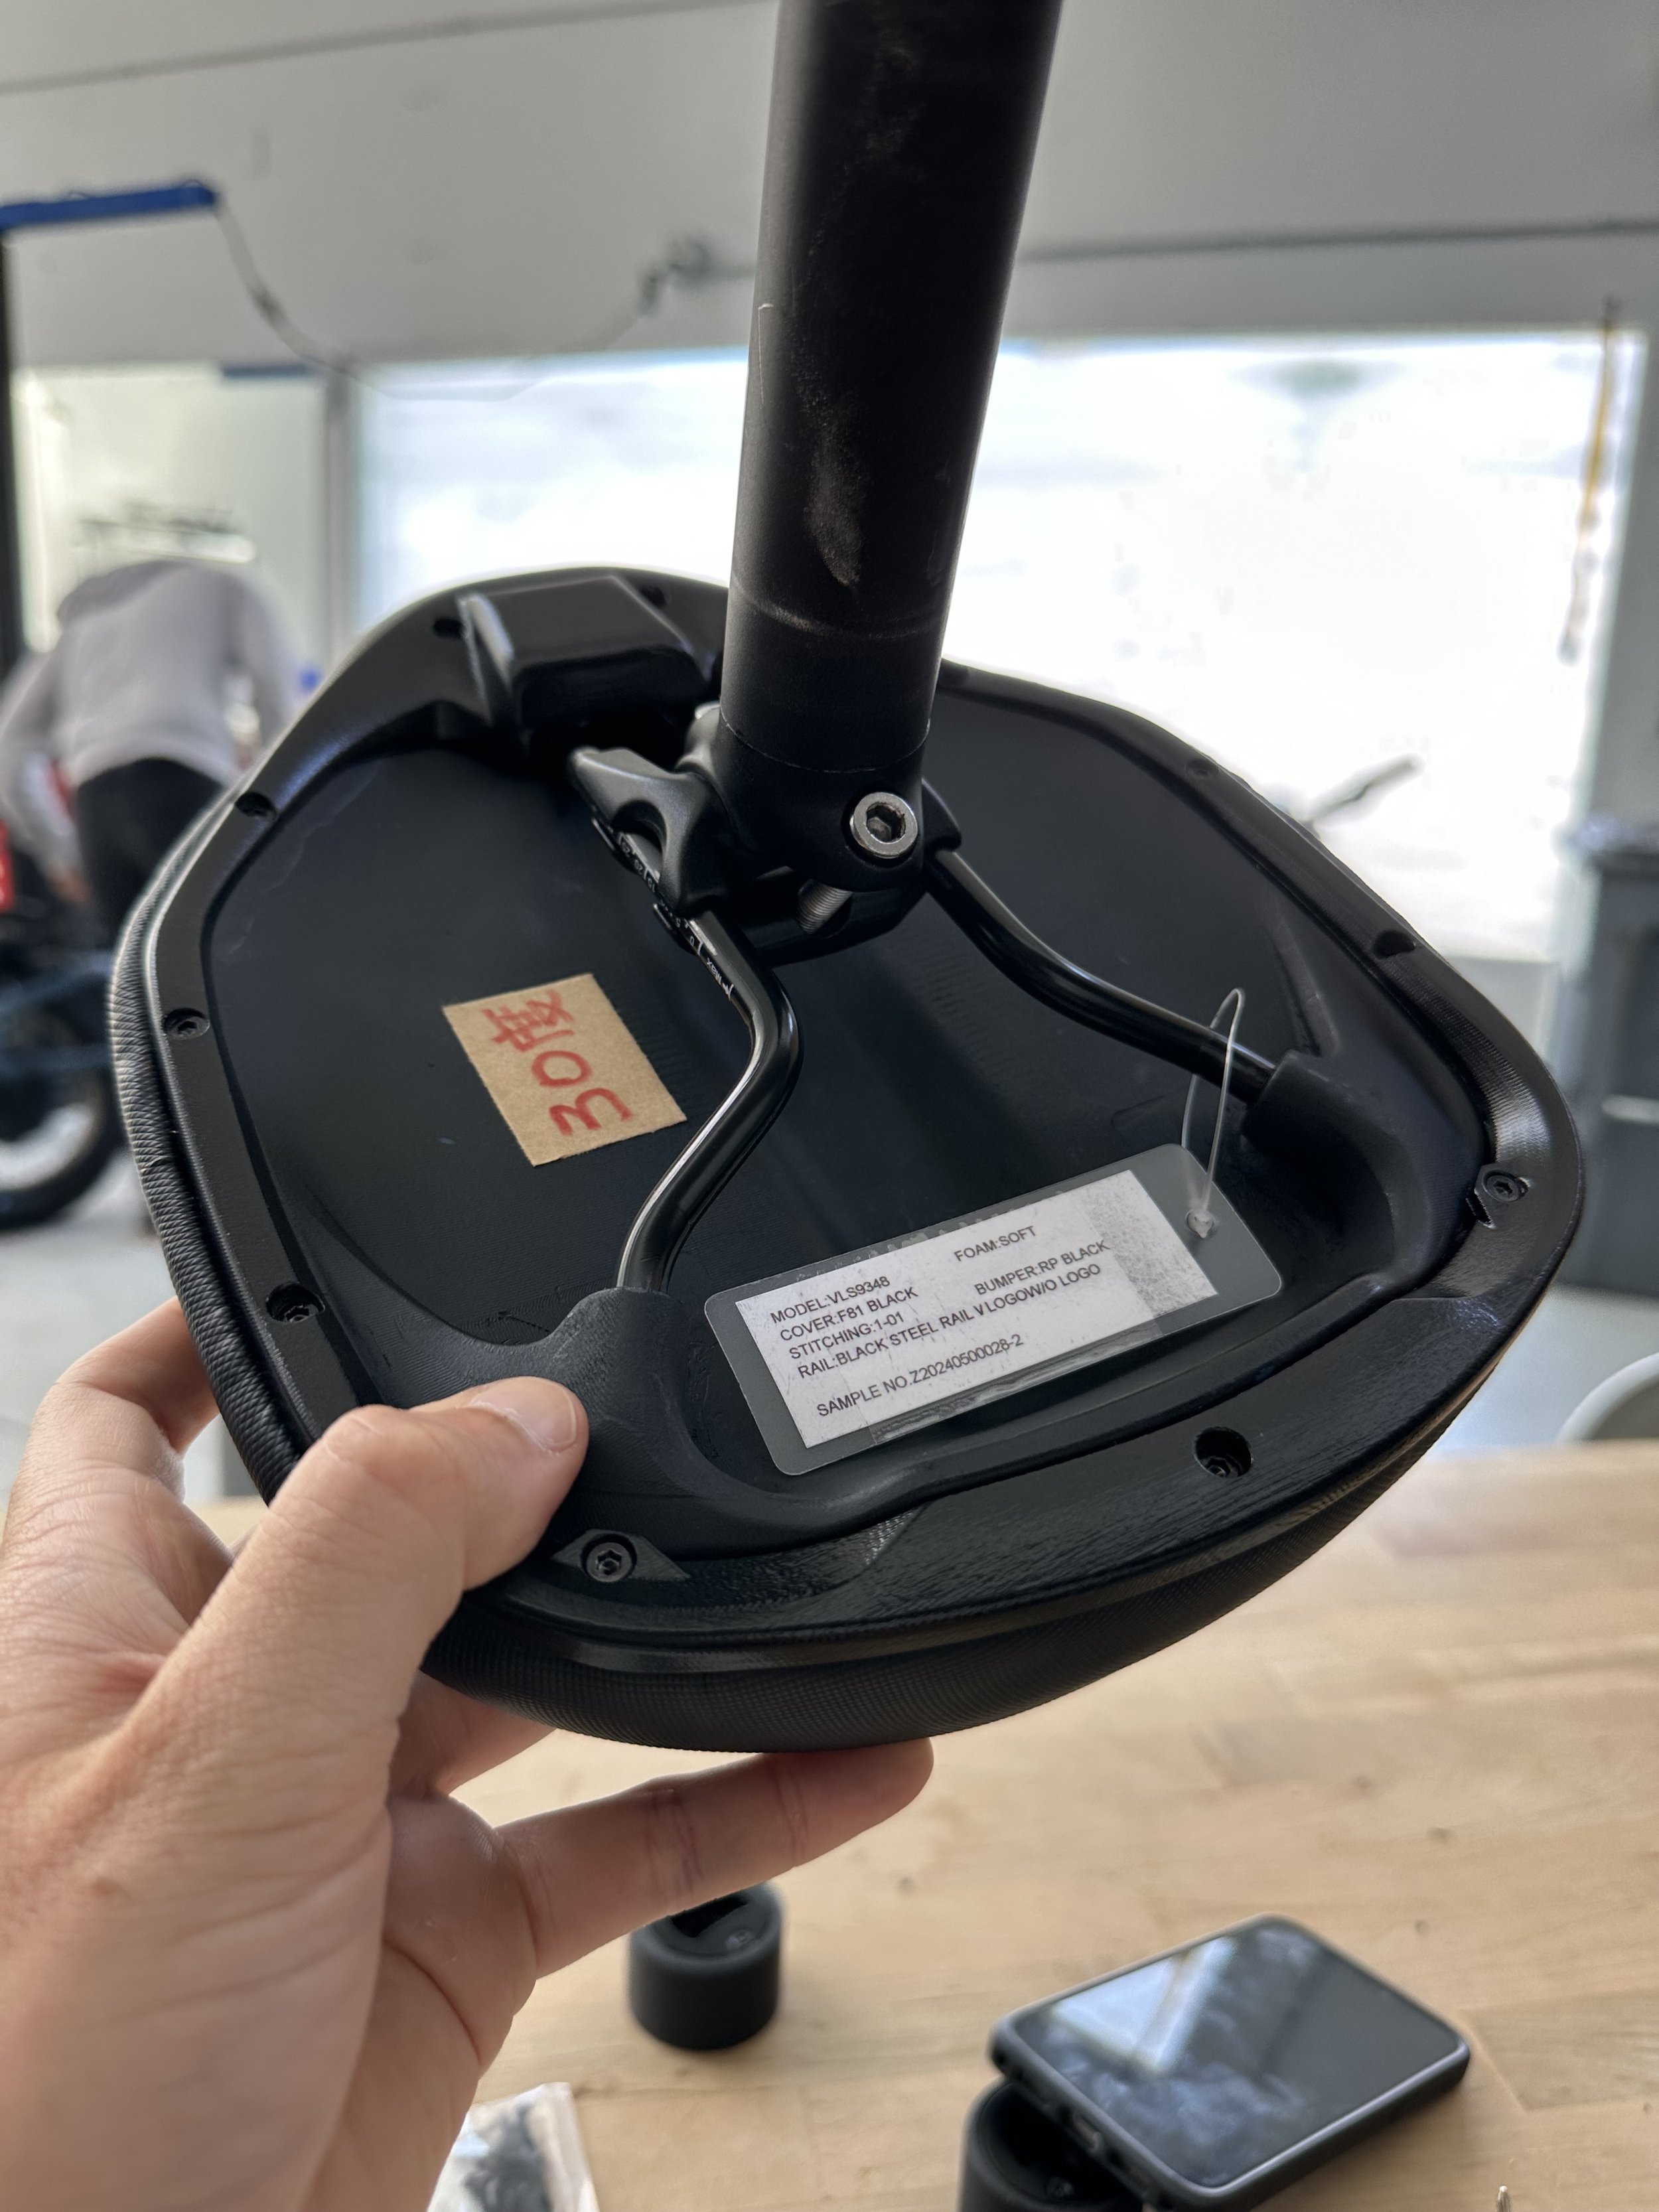
Since our bike blends elements of a bike and a moped, we wanted a saddle that does the same. My goal was to combine a familiar silhouette with the comfort of a larger saddle for increased comfort. Without the need for pedaling, I increased support to reduce pressure on the sit bones. After multiple form studies and functional prototypes, we dialed in just the right balance of shape and cushion that allows our riders to go as far as they want without feeling fatigued.

Initial sketch with overal dimensions based on regular bike saddles

Early form explorations printed at 1/2 scale

First article. This form was too flat.

First article underside. We were able to drop about 10mm in height from this

Testing on competitors' bikes before ours were ready to ride

scale print of more rounded form
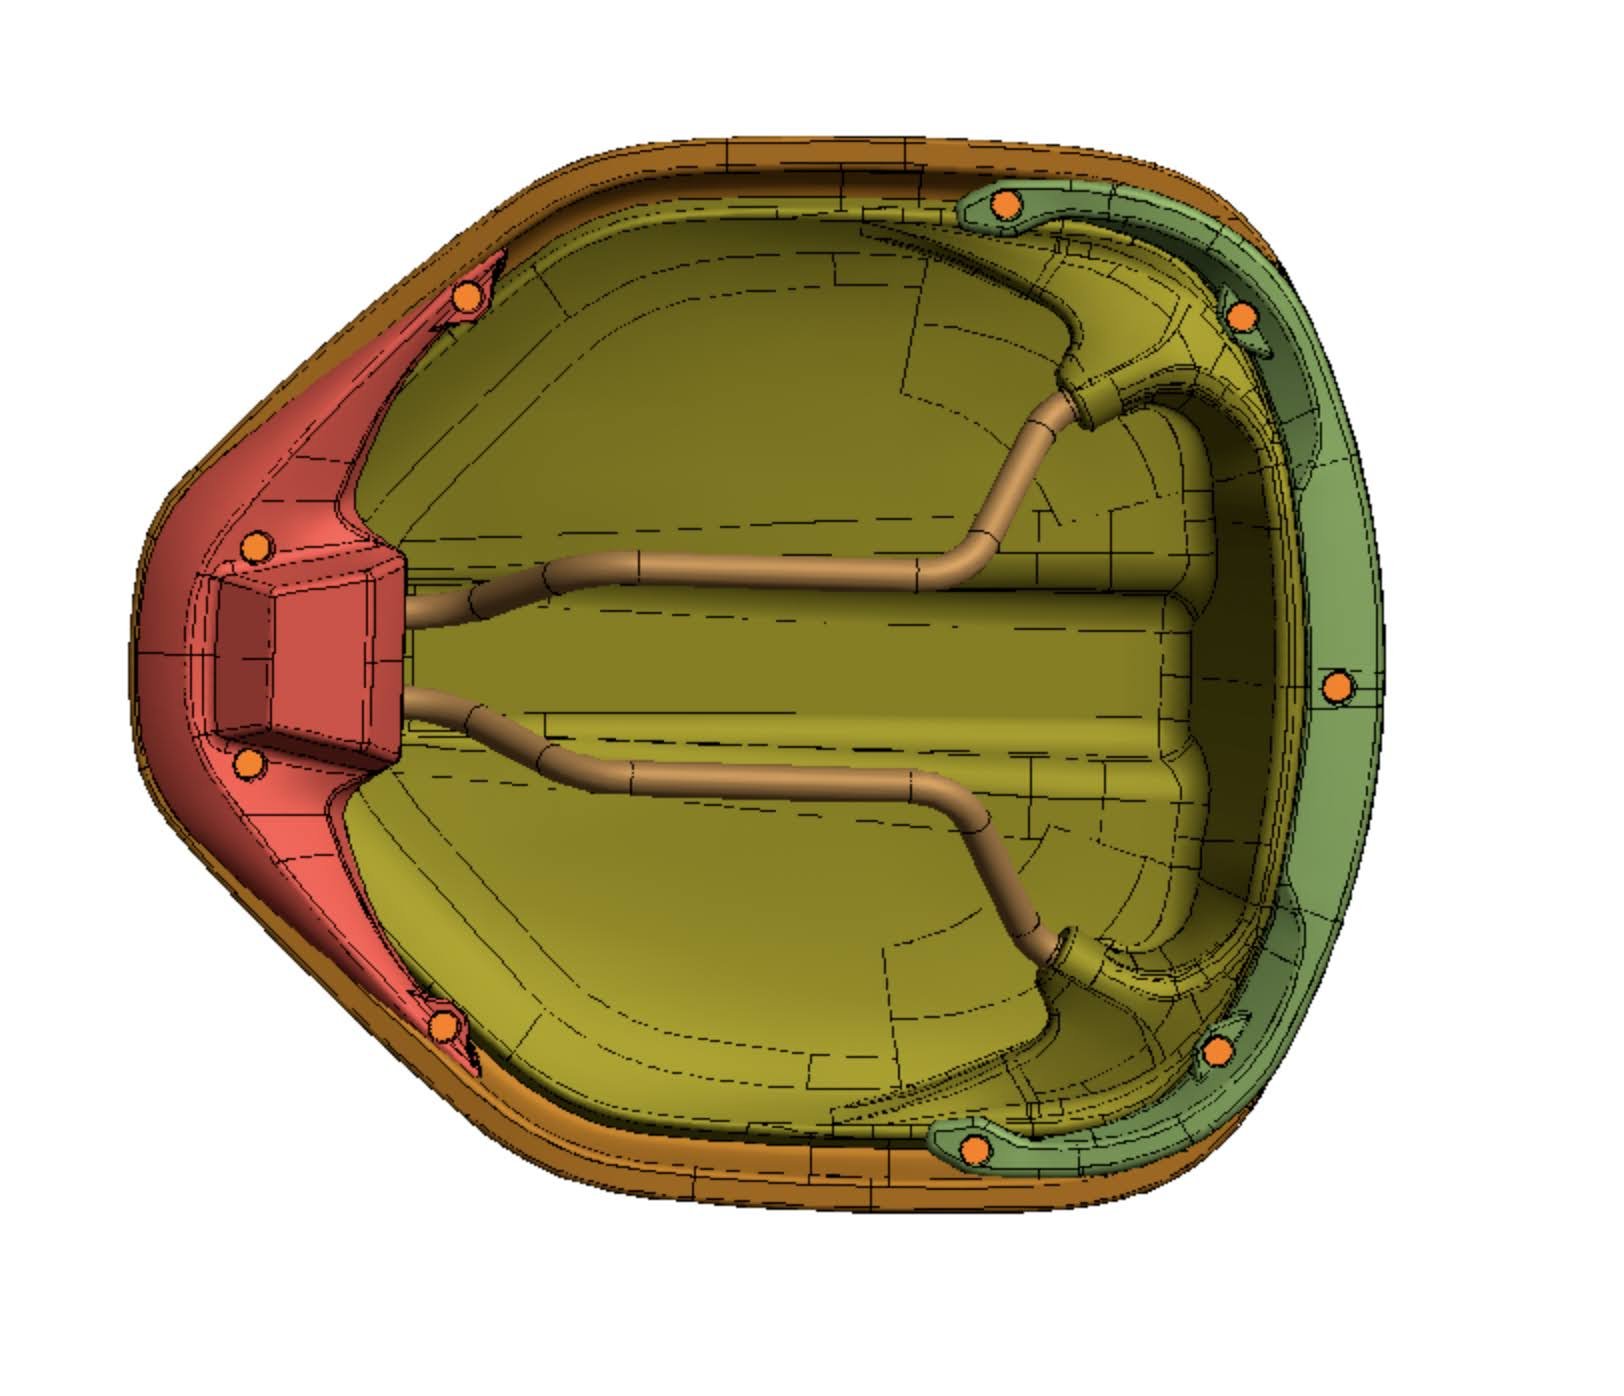
While the top surfacing was provided by me, the final design of the internals was handled by Velo in Taiwan
Final prototype with 30A foam and a fully-covered outer seam
Let’s connect!


